Immediate Provisionalization Planning -
experience the immediate implant
and provisionalization
technique with us.
Request UPS &
Shipping Label

Click on the button below to be taken to the UPS portal where you can fill in our information.

We will then email you a UPS shipping label allowing you to mail us your package using our account.
Proceed


Click to download
Smile Design
Sequence
This is a power point presentation. Click to download. You must have a Power Point compatible program to view the smile sequence.
Contact Our
Technical Director
Having troubles or complications treatment planning a case?

Contact our technical director and founder, Jordan Lott.

Click here to learn more.
Cosmetic
Checklist

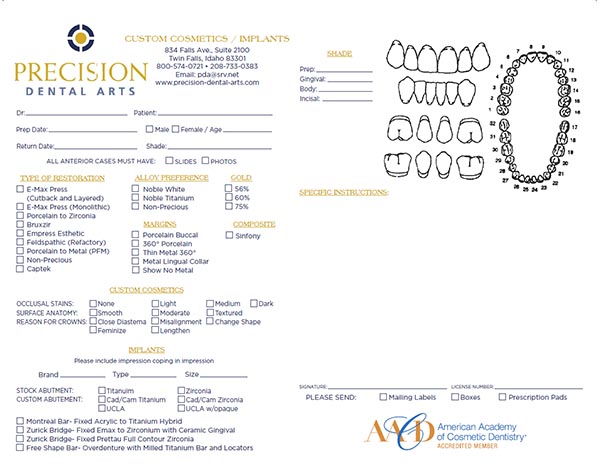
To help serve you better, we have put together a checklist of the items needed to complete a cosmetic or large restorative case.

  1. Model of pre-op
  2. Model of diagnostic wax-up
  3. Photos of pre-op teeth with shade guide, 1:1, 1:2, from different angles.
  4. Photos of preps with stump shade tabs.
  5. Bite registration- Right, Left, Anterior
  6. Stick bite (horizontal plane parallel to interpupillary line)
  7. Photos of temporaries, full face including eyes, also 1:2
  8. Photos of temporaries, eye to chin relaxed lip position
  9. Model of approved temporaries
  10. Indicate the desired length of final restorations
  11. Detailed lab slip expressing goals of patient.
  12. With all Implant cases, indicate type and size of each Implant to be restored.
  13. With Implant cases, indicate your preference to the type of part to be utilized, (ie: Metal or Plastic)
  14. Always call for an itemized case estimate
  15. If you are enclosing multiple model work or multiple dies, indicate which dies are to be utilized.
  16. We can use only one die for each restoration, we cannot be responsible for a restoration to fit multiple dies.
  17. Please call if you would like an itemized or shortened time schedule for your case
Testimonial
Videos
Dr Michael Lynn Gurney
Dr Andrea Beerman
Dr. Julie Gillis
Close
Close
Close
Miscellaneous
Videos
Ivotion – Digital Denture Innovation at the Chicago Midwinter 2020
3Shape Smile Design
Smile Design in EXOCAD PDL
Dental Laboratory Materials and Services
Close
Close
Close
Close


Taking
Digital Photos
Shoot to capture translucency, depth and the tooth's natural surface texture.

Taking accurate digital pictures can mean the difference between a great case and an average case.

1. Use diffused soft light that illuminates teeth well to capture the translucency, depth and texture. (Do not use a flash)

2. Photograph the patients natural teeth with shade tabs for an accurate comparison to the natural teeth.

3. Use a zoom lenses, not a wide angle lenses. A wide angle lenses can distort the shape to the natural teeth similar to the mirrors at a carnival that make you look taller, shorter or fatter than you actually are.

4. Hold the camera away from the patients teeth and zoom in on the teeth vs. placing the lenses almost on the teeth.

5. Remove any unnecessary or distracting equipment / tools from the area being photograph to allow for a clear unobstructed view of the patients natural teeth.
Taking
Perfect Impressions

1. ADEQUATE REDUCTION AND SMOOTH PREPS: Depth cutting burs and clearance tabs are helpful but you must think anatomically for realistic contour and esthetic shades! For PFM's it's important that you have 2mm occlusal reduction and at least 1.5 mm on the facial for porcelain esthetics. Smooth your preps to reduce sharp angles and irregularities (hat cannot be dequately
reproduced in stone.

2. IDEALIZE ADJACENT PROXIMAL AMD OPPOSING1 OCCLUSAL CONTACTS BEFORE IMPRESSING: Too many cases arc compromised by a failure to address these irregular surfaces. By minimal recontouring of adjacent proximals you can often dramatically improve results. Occlusal adjustments (equilibration) will help lab techs properly mount a case and minimize occlusal adjustments on crowns at delivery.

3. CLEAN THE PREP ADEQUATELY AND DRY IT: If you used a flowable composite or other resin base, build-up, or temporary material on the prep, there is a dispersion layer on the prep surface that inhibits PVS impression materials. Thoroughly wash and pumice preps before impressioning to emove
contaminants.

4. IMPRESSION TRAYS: Restrict quadrant tray use to 1 or 2 posterior units when there is a posterior stop (tray recommended from Clinician's Choice Quad Tray 1-800-265-3444.) Use full arch trays when no posterior stops, restoring canines, or 3 teeth or more. Never let teeth touch the tray: distortion, rebound, and powdery inaccurate cusp tips are all the result. Don't use triple trays for inlays or onlays. When margins meet mesh, we all lose.

5. FLEXIBLE TRAYS: Flexible trays will flex buccal-lingually to accommodate more bulk of material and then rebound. Die is small, tooth is big. Crown doesn't fit, margin is open and occlusion is high.

6. DON'T RELINE IMPRESSIONS:There is simply no way to "see" that an impression is completely reseated in exactly the same position or to the same degree of closure. Your relined margin might look great but it's relation to the occlusal surface of adjacent teeth and to the prep itself is often inaccurate and undetectable until seating failure.

7. BITE REGISTRATION: Use a rigid bite registration material like Blue Mouse or similar rigid material. Please don't use clear bite or other rubber like materials that have a memory or offer resistance on closing. When doing one or two teeth, take a bite over the preps only and make sure the contra-lateral occlusion is unaltered while taking the bite.

8. USE MORE WASH: Nothing improves margins, occlusion, fit and contacts more than using more wash (light body). Putty, medium or heavy body tray materials simply don't have the detail you need to get accurate dies. Contacts, opposing teeth and prep detail are all enhanced by more wash. Again, the result is fewer adjustments.

9. FITTING CROWNS: If a crown doesn't go to place immediately, check the die. Impression materials are far superior to gypsum when it comes to reproducing sharp detail on incisal or occlusal edges, axial line angles and other areas. Careful inspection of the die may reveal an area where detail is not accurate to the prep. Brushing these areas with a fine diamond is quicker and easier than most fit-checker silicones, markers, etc.

10. CEMENTATION GETS EASIER: The newest cement from 3M, RelyX Unicem, appears to have won the hearts and minds of dentists all over the country. For ease of use, clean up, and reduced post-op sensitivity, nothing seems to beat this new material by all accounts of Keller clients.


Facebook LinkedIn Youtube